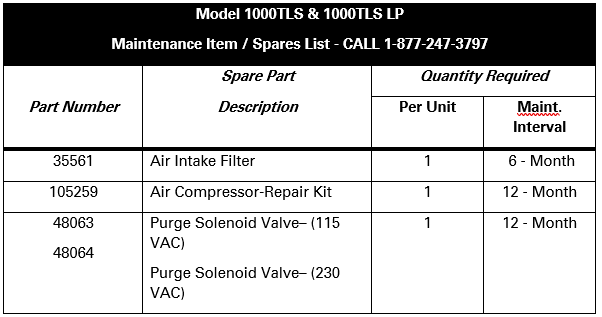
Model 300 & 1000 TLS Dehydrator
Quick Start Guide
Congratulations on purchasing your new Dielectric TLS dehydrator. This quick start guide will detail the necessary steps to get your dehydrator quickly setup and working in your system.
Please refer to the complete user manual for further detail on each section of the guide and all safety warning information. Instruction booklet IB-413 is available at www.dielectrictechnologies.com
Before You Begin
Do not power up the dehydrator with the dry air outlet fitting plugged or shut off. Immediate pressure gauge damage may result.
The model 300 & 1000 TLS dehydrator is a compact and efficient unit which utilizes the volume of the system being pressurized as an air storage tank. The dehydrator comes pre-set from the factory to turn ON at 2-3PSI and OFF at 7-8PSI. As the system being pressurized fills with air the dehydrator will shut off and then as the system bleeds down the dehydrator will turn back on and run again for the required amount of time to refill the system.
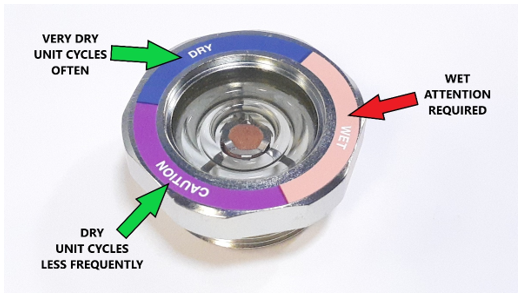
Because the dehydrator run time is determined by the volume of each system the amount of time that each unit runs will vary. The dehydrator comes equipped with a visual color change indicator to determine the dryness of the output air. In some installations that are very well sealed the dehydrator will not cycle often enough for the color change indicator to remain showing a dry or very dry color and a small leak may need to be created in the system to allow the dehydrator to cycle more frequently.
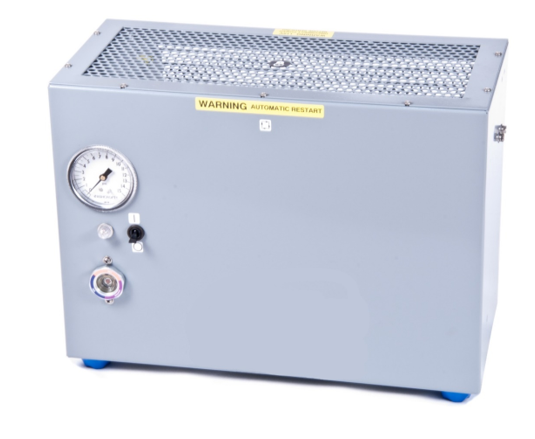
Install the unit in a location close to an appropriate power source (115V or 230V depending on model) and in an area that remains between 33-120 degrees Fahrenheit. Allow for at least 3 inches of space on all sides of the dehydrator and additional space on top to allow for warm air from the compressor to escape.
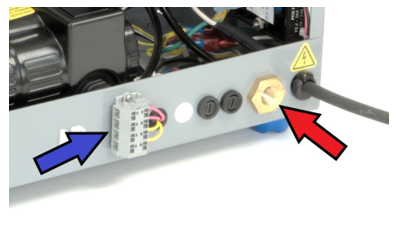
The unit comes with a ¼” Male NPT x 3/8” compression fitting to accommodate 3/8” OD tube from the user system to supply dry air. Install the outlet fitting in to the bulkhead (red arrow) but do NOT connect the air outlet tube at this time.
The dehydrator is supplied with both power failure and low pressure normally open dry contact alarm outputs. (blue arrow) The pink wires are the power fail alarm, the two yellow wires are the low pressure alarm.
Turning The Dehydrator On
The dehydrator is now ready to be powered on. Turn on the on/off switch on the front panel and observe operation. The pressure gauge should not build any pressure because the dry air outlet should still be disconnected and open to atmosphere. Listen for an audible blast of air every 30 seconds coming from inside of the unit as the drying cylinders cycle back and forth while the compressor is running. Allow the unit to operate continuously like this for about an hour to ensure the dehydrator is producing completely dry air. You may begin to see the color change humidity indicator turning a darker color as it dries out but typically the indicator will take additional time before fully changing colors.
After allowing the unit to operate for some time, turn off the unit and attach the air hose from the system to the dry air outlet fitting and restart the unit. You should now begin to see pressure building on the front gauge, but it may take some time for the unit to pump up and shut off depending on total system volume.
Monitor the pressure gauge and ensure the dehydrator turns on and off at the pre-set pressure. Please note that it is not recommended to adjust the on/off pressure switch from the factory setpoints. If adjusting the pressure higher is desired refer to the adjustment procedure in the complete instruction booklet.