ATS300 Plus Central Office Dryer Controller Quick Start Guide
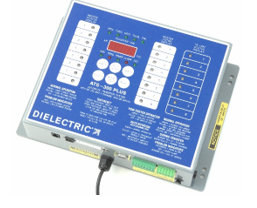
This quick start guide will detail the necessary steps to get your ATS300 Plus dryer transfer system installed with Smart Tech dryers and programmed in auto rotation mode. For more detailed instructions on use with legacy Dielectric dryers, non-Dielectric dryers or programming the unit for roster mode please refer to the complete user manual, IB-422 available on the included USB drive or on our website at www.dielectrictechnologies.com.
Installation Requirements: The ATS300 requires a standard 120VAC outlet for power supply and should be located close enough to the air dryers to allow for the serial cable connections. The ATS300 includes one 12’ cable and one 25’ cable. Additional cables may be purchased separately for use with more than 2 air dryers. Do not attempt to use serial connection cables that were not designed for the ATS300 and purchased from Dielectric. The ATS300 also allows for both a dial up phone connection and a LAN connection for remote monitoring or programming.
Connection to Air Dryers
Connection to Air Dryers: Use the provided serial bus cables to make the connection from the ATS300 to the ATS interface board on the rear of the first air dryer. Next, connect the first air dryer to the second air dryer with the other serial cable provided. Up to 8 dryers in total may be connected for use on the ATS300.
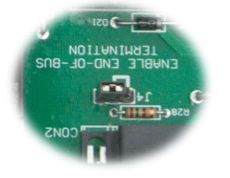
NOTE: The last air dryer connected to the ATS300 will require the interface board to be partially slid out from the air dryer and a jumper moved over to the right from the factory default position to enable end of bus termination at the end of the communications chain. (Factory position shown)

Programming
Programming the ATS for Auto-rotation: Before beginning to program the ATS300 ensure that each dryers serial address has already been programmed in the dryer setup menu (A1,A2…etc.) Refer to the dryer manual or dryer quick start guide for more information.
- Remove the protective tube from the battery connection by pulling it straight out of the top of the ATS300 to enable the backup battery. Plug in the ATS300 and after a 1 minute delay the ATS should light up and will default to roster rotation mode.
- Ensure that all of the air dryers connected to the ATS are visible on the right hand column “A UNIT STATUS DISPLAY” If they are not visible double check serial cable connections and dryer addressing.
- Press and hold the RIGHT INDEX button until the “PROG.” led blinks red. Press and hold the LEFT INDEX button until the LED’s for “roster status display” turn off and a number appears in the display. The number that appears indicates the numbers of dryers that will normally be in standby.
- Press the LEFT SELECT button to change the number of dryers in standby. (Normally 1 dryer if you have two dryers in your central office.)
- Press the TEST RESET button when finished.
Programming Current Time & Date:
- Press the TEST RESET button to bring up the current date and time flashing on the display and the LED for the current day of the week illuminated. Press and hold the LEFT INDEX until the “PROG.” led starts blinking.
- Press the LEFT SELECT button to move the day of the week until the LED for the current day of the week is blinking and then press the LEFT INDEX button to save the day of the week and move onto the current time.
- Press the LEFT SELECT button to change the hour while observing the AM indicator in the top left of the screen to determine AM/PM hours. Press the RIGHT SELECT button to change the minutes.
- Press the LEFT INDEX button to move onto the current date. To change the month press the LEFT SELECT button and to change the day press the RIGHT SELECT button.
- Press the LEFT INDEX button to move onto the current year. The last two digits of the year will be displayed and can be changed by pressing the RIGHT SELECT button.
- Press the TEST RESET button to exit programming mode.
Programming Transfer Day & Time:
- Press and hold the LEFT INDEX button until the “PROG.” LED starts blinking and the “SUN.” LED is steady or blinking green. A solid green day of the week LED indicates that day is selected for transfer and blinking green LED indicates the day is not selected.
- Press the LEFT INDEX button to move through the days of the week and press the LEFT SELECT button to select or de-select them for transfer days.
- After programming each day of the week through “SAT.” the LEFT INDEX button will go to the transfer time on the display.
- Press the LEFT SELECT button to change the transfer hour (once again observing the AM indicator for AM/PM) and press the RIGHT SELECT button to change the transfer minutes.
- Press TEST RESET to exit out of programming. The programmed transfer time will automatically display on the screen and the transfer day illuminated.